

Run an A/B test end to end
Take an opportunity from idea to a declared winner — set up, deploy, monitor, and conclude.
This is the full happy-path for running an experiment in Spar. The guide assumes you already have an opportunity to test. If not, start with Add your own idea or promote one from Triage.
1. Promote the opportunity
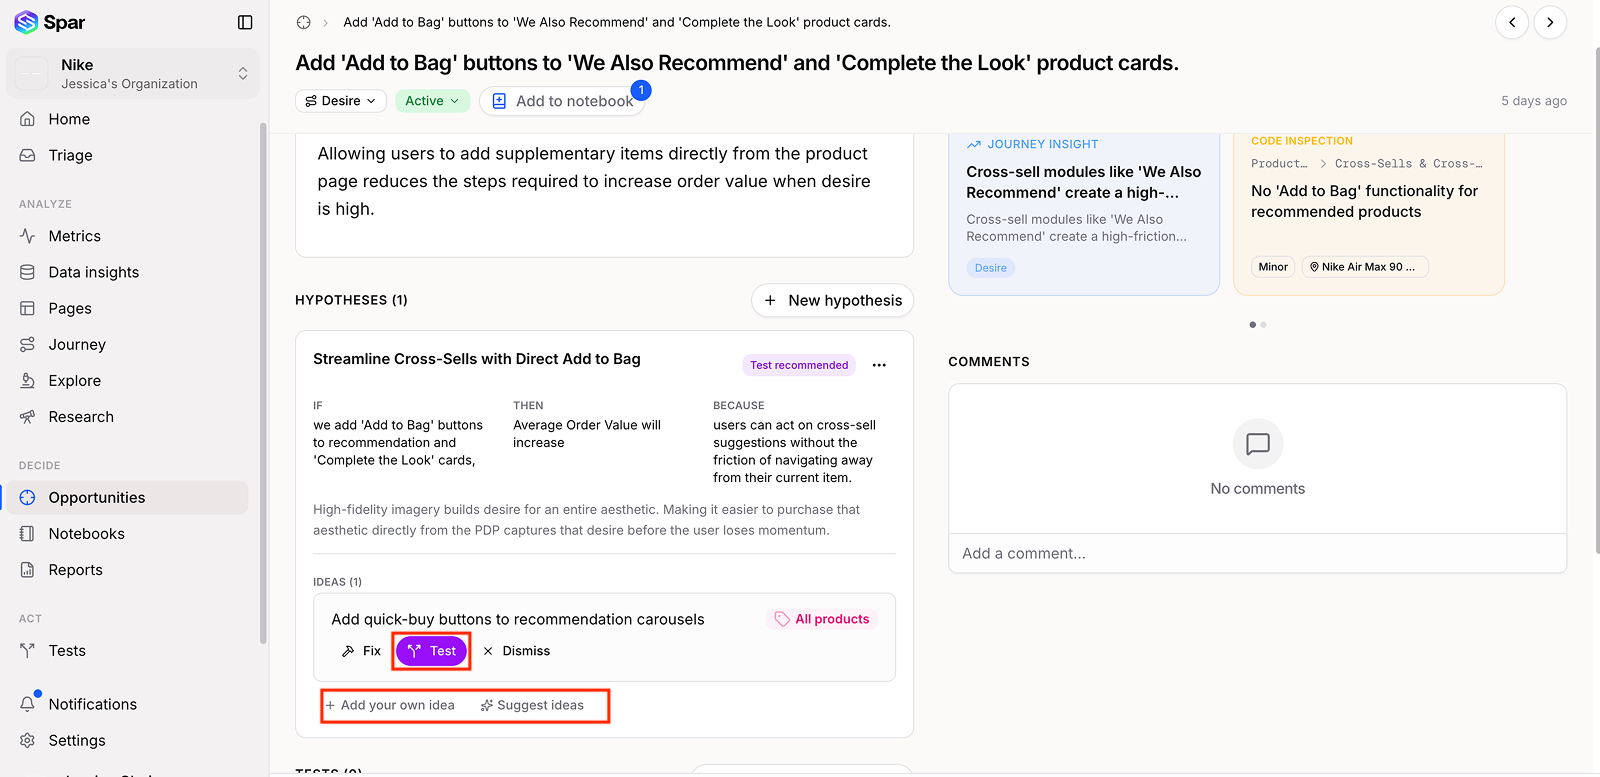
Navigate to Opportunities → Active and select an opportunity to open the Opportunity Details page.
- Review the test ideas automatically generated by Spar.
- If you like an idea, click Test on the corresponding test idea.
- Once a test idea is accepted, Spar automatically promotes the opportunity and test idea to the Tests page in Draft status with pre-populated test details.
If none of the suggested ideas fit your strategy, you can:
- Add your own idea, or
- Suggest ideas
Note: You can create multiple tests from the same opportunity to evaluate different ideas and determine which performs best.
2. Configure setup
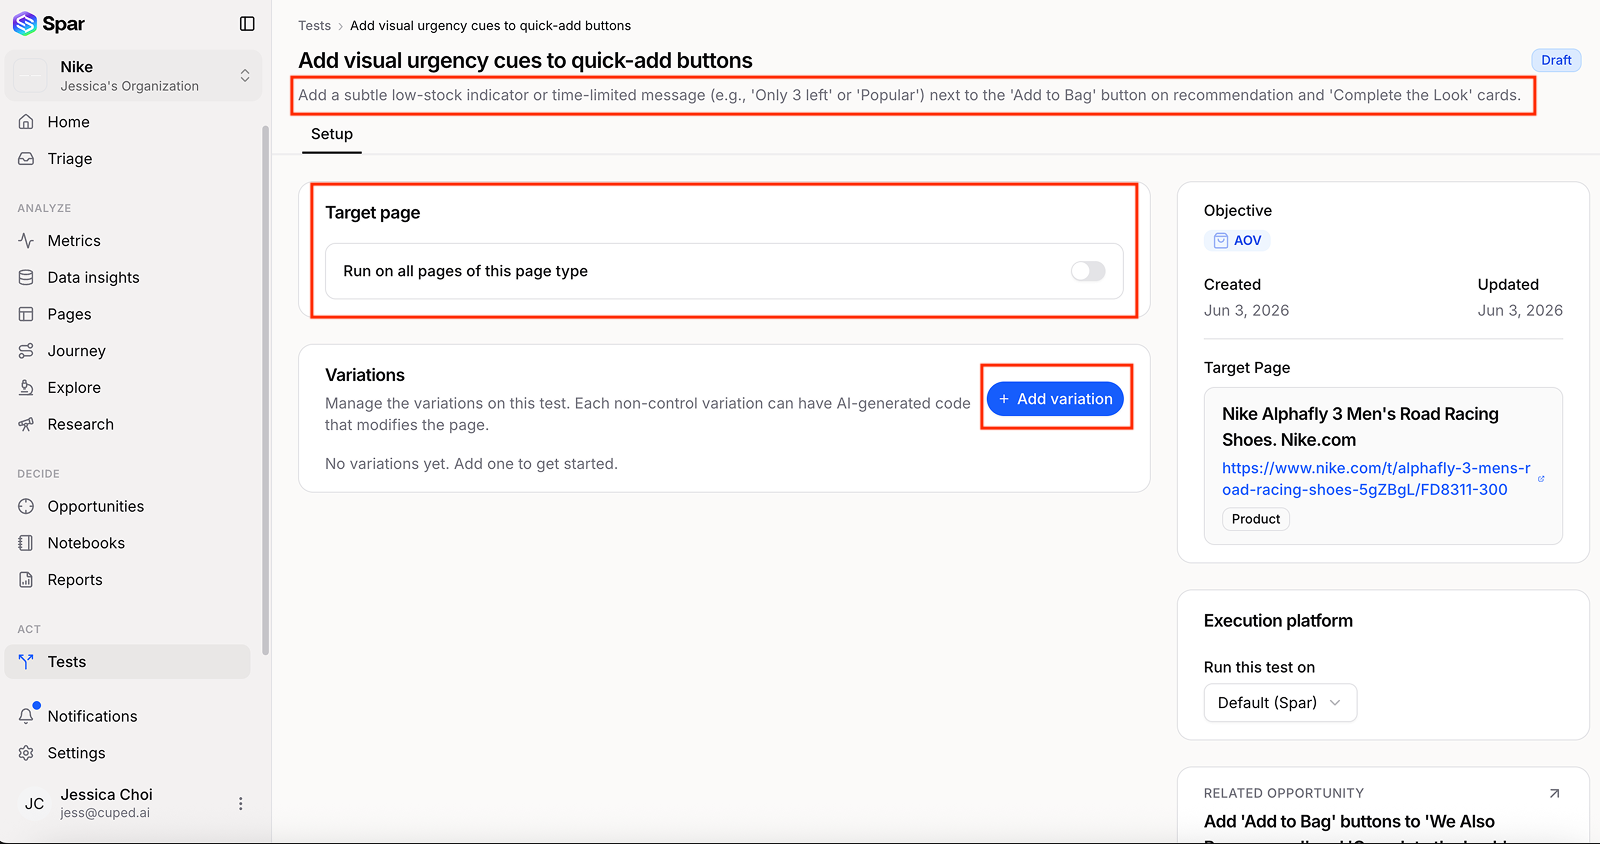
Click into the test from the opportunity page, or navigate to the Tests page to open the test detail. From here you can review and update the setup before the test goes live:
- Refine the idea description — tighten the hypothesis or add more context.
- Update the target page and URL targeting — confirm the test runs on the right pages.
- Add a variation — include additional variants to test different approaches side by side.
3. Wait for the variant to generate
Status changes to Generating while Spar produces the variant code. It usually takes a few minutes. When it's ready the status flips to Draft.
4. Move to Ready, then deploy
Drag the test card to Ready on the kanban — this is your final checkpoint. When you're ready to go live, drag it to Running. Spar deploys through whatever execution target you picked.
If you want to deploy somewhere other than Spar's default, see Send a test to your experimentation platform.
5. Monitor on the Analytics tab
Once the test is running, open its Analytics tab. You'll see sample size, per-variant conversion rate, and a significance chart over time. Spar monitors results continuously so you don't have to pick a duration upfront: Spar declares a winner once the test has run long enough and cleared your confidence threshold.
6. Declare the winner
Spar will flag a result when it's reached. Drag the card to Completed to lock in the call. Options from there:
- Ship the winning variant as a permanent change (use Fixes to track the rollout).
- Archive if the result was inconclusive after enough time.
- Re-run with a tweaked variant if the test was close but not decisive.
7. Capture the learning
Wins and losses both matter. Add a short note to the test (or pull it into a Notebook) describing what you learned. Future-you will thank you when a similar opportunity comes up.
Common reasons a test stalls
- Not enough traffic — Spar will warn when projected duration crosses your patience. Consider promoting the opportunity as a Fix instead.
- Inconclusive over time — Spar won't force a winner that isn't there. Re-design the variant or drop it.
- The page already has a running test — only one test can run on a page at a time. Finish or pause the other test first.
- Deploy errors — status will flip to Failed. Check the test's setup tab; usually it's a selector that no longer matches the live theme.
Last updated on